Modeling a head
Thought the entire course, I'm going to be modelling with ZBrush to make a human head. I'm going to document my progress via screenshots during and after lessons.
I started with a preset sphere that has Dynamesh built-into the sphere. Dynamesh is a useful tool that helps with adjusting the resolution and polygons of my model, and helps with the next few issues I'll get into later.
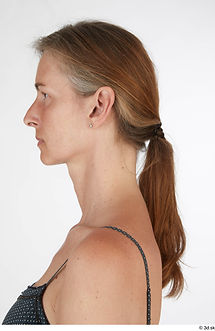
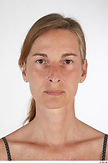
For reference, I'll be using images of a person that I've found on 3D.SK. What I need for this model is a front and sideways view, and so I've settled with the images on the left.
When opening ZBrush, I imported the photos into the project and used the Draw menu to put them into the background. There are options that also help me adjust the photos by cropping, moving and flipping. There is also a feature that makes the sculpture translucent so I can see both the background photos and the sculpture while I model the head.
When I'm happy with my results, I begin bending and shaping the sphere with basic move and scale tools for now.

.png)
One of the more common sculpt tools I'll be using will be move. This tool is used to drag the polygons and mould the sphere into my desired head shape. I also press S to quickly change the size of the brush. For this, I need it to be big. For now, I'm making the general shape of the head, as well as the nose and the holes where the eyes are. Thanks to the symmetry tool, whenever I make changes to the left, it applies to the right, therefore having matching eye sockets, ears and nostrils.
To move around the scene, I move the mouse whilst holding the mouse button to rotate, or Ctrl, Alt or Cmd (Modelling this on an Apple computer) to zoom into the model or move the camera's position. Like other software, you press F to centre into the model.
But one of the more useful tools is holding the shift key when moving the camera. It locks to the sides and fronts. This is useful for viewing my photos and modelling from that side.
When I was happy with the shape of the head, I moved onto making the neck. I start off by masking the area with a mask lasso tool, and then stretch the neck downwards with the move tool.
Only one problem; the neck looks awful with it's stretched polygons. This is where the benefits of Dynamesh fit in. When using the mask tool outside of the model, the stretched polygons split into individual polygons. This improves on the model's quality and allows me to model more of the upper-torso for the next bit.
.png)
.png)
.png)
With the neck smoothed out with a smooth tool, I then used the move tool to stretch out some shoulders and dynamesh the stretched textures again.
Following this, I decided to double my polygons for the next steps. I've done this by using the Divide feature in Geometry and the reason for this is that I needed to work with more polygons to make smaller cuts and sculpts that would be next to impossible with little polygons.
.png)
In 2 separate topics, I'll be covering the sculpt of the nose and mouth in grater detail with more images. What I've learnt applies to this head and there isn't need for repeating it here.
All there is needed to mention here was that I've started on the mouth, then the nose and smoothed out and added details to both of them.

The ear is next and I started off by drawing a mask on the area where the ear is. Then invert the mask so the ear area is exposed and then extrude the ear with the move tool. The same is done on the other side Thanks to the symmetry tool.
Using the reference of this image and other images, I draw the inside of the ear using the DamStandard and Standard brush tool to dig in the inside canal and add features around the helix.
Additionally, I used the move tool to stretch out parts of the ear (like the Lobule and the Tragus)
NOTE: At this point, this is where I've been having problems with the symmetry tool. It tracks the model fine, but when using smaller brushes or in general, the range starts to lack. When moving further than the nose, it fades out and I can't edit both sides. One side will have detail and effort put into it, and the other one has either no features or is still contorted like it was rushed.
.png)
.png)
The eye was done by carving a hole with a standard brush tool and then added eyelids with the move tool stretching it slightly to make a rounded appearance.
While I've done this, I appended a separate entity in the form of a sphere to act as the eye. I resized it and moved it into the hole. I'd then stretch the eyelids to better match around the eye. When that was done, I duplicated the sphere and placed it to the left eye socket.
NOTE: Still having issues with the symmetry tool. I tried to do a small trick in where I cut the face in half, duplicate the other half and glue them together somewhat. I wasn't able to flip the duplicate for some reason so I'm stuck with this un-symmetrical face. Should've done the left eye too.
For the final touches I continued to smooth out the model by dividing the polygons further and touching up on the features like the nose and mouth since there were some steps I missed.
Additionally, I drawn some eyebrows using the DamSurface tool to add some level of flair to the model. Still unsure on hwo to do full-on hair, so I'm doing something on the side.
NOTE: Symmetry's still broken. Had to take wild guesses when drawing on the left eye and even still can't make it look the same.
.png)
Finally, I've rendered the front and side of the image for everyone's viewing pleasure. Looks a lot Slavic in eyes.

The Nose
For the nose, I've started with drawing an upside-down T to make form a base. I then draw a round triangle on the bottom and work my way up the triangle to make a slide with 3 bumps on it. When I was happy with it, I smoothed it out and it looked like a nose.
Next, I used a regular sculpt tool to make 2 holes on the bottom to make nostrils. Then use the sculpt tool to draw inbetween the nostrils.
.png)

.png)
I continue to smooth out the model and reshape it to a much desired size. On the sides of the model, I draw a circle around the round sides of the nose using a DamStandard tool. Then smooth it out to make a natural edge between the face and nose.
Lastly, I briefly use a tool called TrimDynamic, which simply flatterns the polygons wherever I point my cursor. Since there is a bone in the nose, I want to make a slight change there and then smooth it out. I also did a small amount of flattening to the bottom for adjusted details.
Once everything got smoothed out, I rendered the model and you can see the results below.
.png)


The Mouth
.png)
The mouth is a bit complicated with the setup but I'll try to explain it the best I can.
I started by drawing the outline of the upper-lip, 2 lines on both sides going downwards, and 2 holes on top and bottom; the top being the philtrum. I use this as a reference to how big the mouth is, as well as where to draw the chin, extra skin and lower lip.
Before that, happens, I smooth it out so when I draw over the lines, they're mostly buried. With the move tool, I push the lip forward and sqeee the sides to make it look more like a mouth, rather than having the contsraints of drawing on a circle.
I finally take out my Standard tool and draw a chin, lower lip and an extra layer inbetween. As I draw on the lower lip, I stop to also draw the outline inbetween the upper and lower lip and continue to smooth it out in the process.
There is this trick to using the move tool to push the upper lip forward, but I never got a good grip on how to properly do it. So I just used a standard tool to draw it and outline the edge
Finally, I used the move tool to change the size of the lips and move around the chin so it doesn't look too weird as you see on the right. A couple more outlines are drawn on the middle to sharpen the gap and more smoothing is down to the parts inbetween the mouth and chin to have it blend in properly.
Then I just rendered both sides and you can see them below.
.png)


The Villain
For this assignment, I've been tasked to sculpt a villain with everything I've learned in the past few weeks. The villain is to be a humanoid with realistic proportions but can include deformities, accessories and scars that would add character and history to him.
Below are a few references and research to help me with modelling the features. (Decriptions on images)

This is a photo of myself from the front and side and it's to be used as reference for whenever I'm modelling. On the side, I write down the kind of burn symptoms I'll aplly on what colour on the face.

This diagram was taken to help tell me what areas would look like and what symptoms to doodle on.

This moodboard takes burns, missing eyes and other conditions to help show me what they look like and what to go for when modelling. There are some future images I've found to help with references, but I didn't add them cos either I had no time or they were too much for the moodboard.
This is a photo of myself from the front and side and it's to be used as reference for whenever I'm modelling. On the side, I write down the kind of burn symptoms I'll aplly on what colour on the face.
This section is on the villain's backstory. If you're not interested, skip the paragrapths.
Grzegorz is a Polish immigrant who left his communist country and moved to England with his crippled mother in late 1991. With him, he smuggled a prototype drug called "Red Sugar" which was a stronger and unstable variant of cocaine. At the time, England was facing a civil race war between British citizens and Arab immigrants, forming gangs and hate campaigns to get either race out of London.
Grzegorz was caught inbetween the war and lost his home, his mother and his left face and arm to Arab anarchists, thinking he was British. They burned everything but never finished the job, leaving a broken man with a box full of red cocaine. With nothing to lose, Grzegorz tracked the men in their homes, tied them up, tortured them and their families and killed all of them. Since then, he stalks London whilst under the influence of Red Sugar, leaving bodies in his path. a couple months later with only one last sachet of Red Sugar, he scores his biggest slaughter yet...
End of backstory.
Below is the progress of my own model from the sphere to a human with a neck and head. (Description with images)

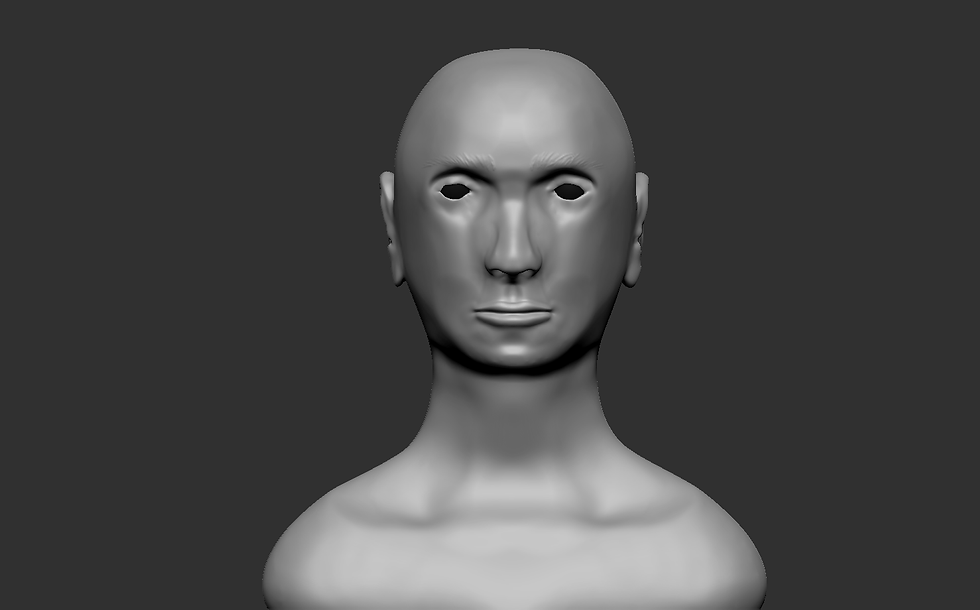
The model starts off from scratch with a sphere with Dynamesh already applied to it. I stretched it to fit my own references shown in the background.

I continue to use my face as reference to help tell me where the nose is and the eye sockets. These steps honestly are a repeat of the last model I've made.

This part goes through the Fibermesh of the model. I chose to go with that instead of modeling the hair on its own due to wanting to make it more real and messy. I'll get to that part in detail later.
The model starts off from scratch with a sphere with Dynamesh already applied to it. I stretched it to fit my own references shown in the background.

.png)
For this part, I've Decided to make an opening on the mouth. I've done this by dividing the polygons that made up the line on the mouth and cut out the polygons to leave a gap. After some stretching and using RamStandard to fold the gaps into the model, I've made a sealed mouth and drawn lips around it.
The method is the same like the other tutorial I've done. I wasn't happy with the last lips, so I hope that this one's better than last time.
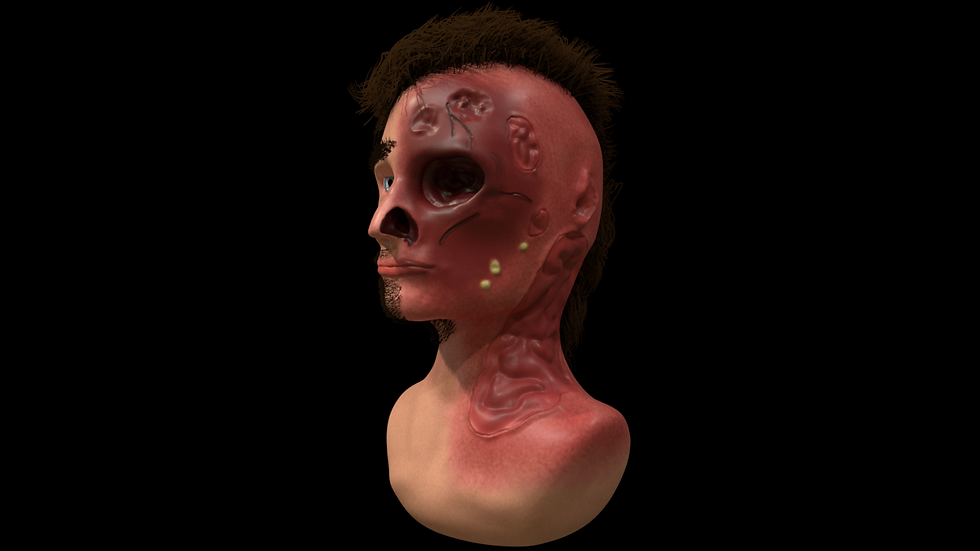
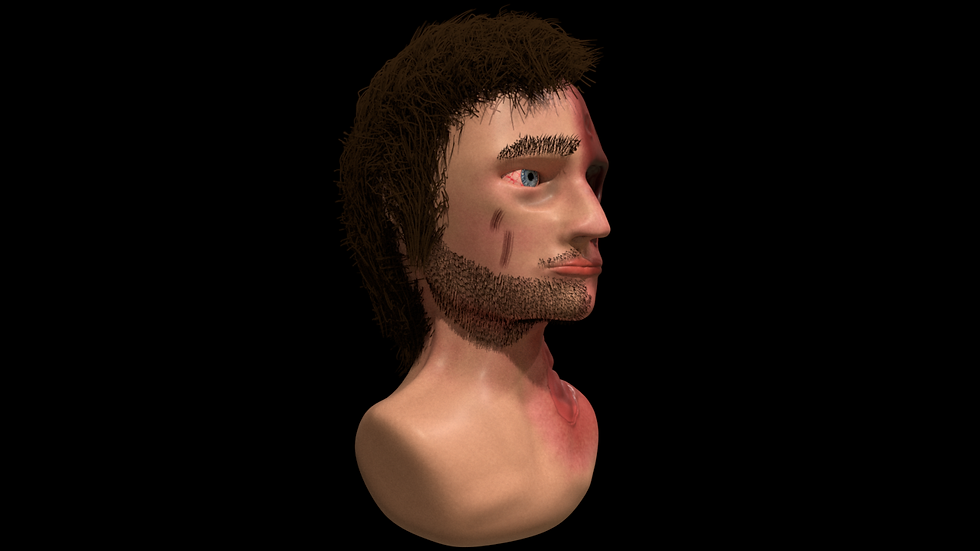
Below are some ZBrush renders for the final model. The eye isn't the best, but Maya will render a better one.


ff
.png)
Before rendering the model in Maya, I've made a low-poly version of the model by copying the current one, compressing it, adding new divisions and then printing the old model to the low poly to match the smaller details.
The reasoin I do this is so that the model runs better in Maya. With the divisions, I can change it in Arnold options so it runs on the highest division.
.png)
The eye is made up of 2 spheres: One for the Sclera and one of the Iris. I was given the Iris and the Sclera was made by me in Photoshop with a few colour tweaks. Using a fade texture, I made the center of the model transparent to show the Iris.
.png)
.png)
The model somewhat looks like this when porting in everything but the eye.
I've made some changes to the hair when assigning tenth of the strands in ZBrush. Just like the model, Maya wouldn't handle that much so I cut down some of the fibermeshes from 100 to 10 or 20 depending on the size and amount of strands needed for reference.
I ported them into Maya and aligned them onto the model. For 3 groups, I've set up a separate hair system for each to edit the length, colour and shading of the hair. I was to also be careful to not go overboard with the settings or it'll look curly.
.png)
After I've set up the hair, I've animated a rotating camera to use for Arnold. This camera is to rotate around the model to get clear shots from each 45 degree angles. I could rotate the model itself, but neither model or hair align right.
Either way, the model has rendered on all sides.

For the assignment criteria, I am to make 4 different facial expressions for my villain sculpture. So, I've went into the Layers tool and it gives me customizable sliders for changing the model's appearance. For the model, I've made 5 for the eye/s and 3 for the mouth to make the villain shocked, sad, grinning evilly or to kiss.
I've ported the posable version of the model into Maya and it automatically opens a window called "Blend Shapes" which allows me to use the sliders like the ones in Maya. I did however ran into a few problems with this.
.png)
.png)
I was unable to port my textures into Maya and instead get a black material. Checked the UVs and there was nothing. Another issue is with the Fibermesh which right now, I don't know how to make them move around with the model. For now, the model has no beard or eyebrows when emoting. I tired porting again and again, updating the UV, the texture but nothing budged.
Right now, I've only done the 2 models with a simple AiStandard skin preset to show what they could've looked like in Arnold.

Finally, I chose to outright render the posable faces in ZBrush directly. It's a shame too because I like the eye in Maya more than in Zbrush.


